
How to repair sanded-through veneer with paint blending.
Sanded-through veneer, or burned-through veneer, occurs when the thin veneer is sanded until it exposes the substrate. This results in unsightly patches that are highly noticeable due to the colour difference.
As the substrate is of a different material, you cannot simply use a darker stain on the area successfully and mask it. It will stand out in your final product.
So what can you do?
Sanding Veneer Successfully
The best method to fix burned-through veneer is to avoid it!
I can see you rolling your eyes! However, burn-through often occurs when you start your furniture refinishing business. I know I was a victim of it (and sometimes still am).
You may not be aware of just how thin wood veneer actually is. Or perhaps you thought you were working with solid wood and were shocked to discover that was not the case.
You can take these steps to improve your chance of successfully sanding veneer.

Now, even a professional refinisher can still burn-through veneer. We simply do not know if a piece has been refinished in the past. If so, it may have already been sanded, and the remaining veneer may have been thin.
So what should you do when you notice that the veneer is burning through? Stop sanding immediately and assess the damage. That problem area may initally seem like a lot of work, but it might have an easy fix.
How large is the patch of sanded through veneer?
I classify the damage into three groups.
Small patches are too small to bother with a veneer patch and can be masked with blending paints to minic wood.
Medium-sized damaged areas of the existing veneer can be fixed with a piece of replacement veneer. The process is similar to repairing chipped veneer.
Large or multiple patches of burnt-through veneer probably is better off replacing all veneer. Such as what happened with this project.
But that piece of furniture is not a piece of scrap now. It can be saved, no matter the damage to the veneer.
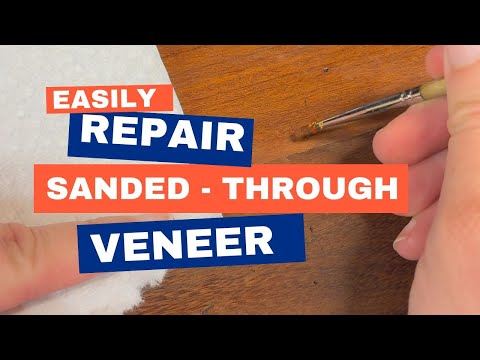
For small patches of damage, I simply blend the area with paint to camouflage the damage and this is what we will focus on now.

Choosing your paints
When you opt to camouflage the area with paints, you first want to determine your finish.
If you are using oils, consider opting for oil-based paints. These paints will take much longer to dry, but the rich tones of oil-based paint will lend credibility to your repair. I find the best results are made with oil-based paints.
However, as you know, water and oil do not mix. Therefore, if you are working with a water-based top coat, you must use water-based acrylic paints.

Paint Colours Needed
You want to get the following 6 colours, whether oil- or water-based paint.
Burnt Umber
Yellow Ochre
Raw Sienna
Raw Umber
Burnt Sienna
Vandyke Brown
With these 6 colours, you can mimic nearly all wood tones. I personally use Van Gogh which are artist oil colours or Amsterdam all Acrylics. The colours listed are standard colours and available via both Van Gogh oil paints and Amsterdam All Acrylics.
Other Tools Recommended

Painter’s Tape – Handy for masking off areas you do not want to touch, or for practicing your techniques
My favourite masking tape

Detail paint brushes– You will most likely be working on a small area, so a fine-tipped paint brush is necessary. I love my detail brushes from Annie Sloan, but any detail brush will work.
Detail brushes don’t need to be Pricey.
Minerial Spirits or White Spirits – Handy for checking what the finished tone of wood will look like or for cleaning oil off of your paint brushes.
Top coat or finish – Choose your favourite for finishing your project.
Tissue – For plotting and smoothing out paint edges.
Preparing the Damaged Spot

Only start camouflaging the area when the rest of the sanding is finished. You want to thoroughly clean the spot and remove all dust and debris. If necessary, mask off any edges that you want to ensure you don’t get paint on.
You should consider the finish you will be using. If it is an oil, hardwax oil, wax or shellac finish, you need to consider that the wood will take on a different tone when finished. It will most likely be darker than it is now as raw, sanded wood.
Either wet the surface or use mineral spirits to show the tone the wood will look like when finished. You can also opt to already finish a patch around the location you will be painting. This will give you a look at the finished wood colours.
How to blend the paint to mimic wood
Blending paint can take some time and practice. You want to start with the darkest and most prominent shade of paint on your piece—your base colour. Once applied, give it time to dry to avoid muddling your paints together.

The Base Colour

Mix from the 6 paint colours you have, blending and testing on a strip of paper against the wood veneer you are working on. When you find a colour that closely matches, that is your base colour.
It is easier to work initially on a piece of paper or even tape on the wood veneer to find a colour that matches rather than directly on the wood surface and then decide whether the colour is too light or too dark.
When your base colour has dried (with oil paints, this can take a long time, even days), you can add the colour variations and wood grain.

Adding Additional Layers
I keep it simple and colour match the most dramatic wood grain colours, pulling them through into the small spot we are working on. The more natural the wood grain flows to the painted wood grain, the more camouflaged the spot. Of course, I work in the correct direction of the wood grain and mimic any grain effect or wood figure.
Consider adding 2 or 3 colour variations to mimic the variations in the wood. Remember to allow drying time to avoid muddying the paint colours with each other. If there is a lot of grain pattern, take your time and mimic as much as you can. Small variations of the grain pattern is ok! Real wood has naturally fluctuating grain patterns.
Use a piece of tissue to blot any harsh lines and blend the edges of your lines in with the surrounding wood. Grain lines are rarely straight edge or a harsh line. Blend it all a little bit.

TIP: Each layer you add should be a thin coat. You want to avoid that you build up such a layer of paint that you ruin having a smooth finish. You do not want your paint to cause a ridge and can be felt.
Adding your Finish

While many people think the blending work is the most important part of this type of repair, it’s not. The finish is actually the most important part. Because the sheen is what will tie the blended paint to the finished wood in the surrounding area.
Our eyes are quicker to detect a difference in the sheen than a tiny difference in colouration.
You can apply your finish when your blended paint is fully dry, and you are satisfied with the look. Just remember. You are probably your harshest critic and will spot the small problems in colouration then any one else will.
Video Guidance
Masking Wood filler and Epoxy
If you had to use wood filler or wood epoxy to repair a damaged spot in the veneer, then blending paints could be your friend. I understand that not every refinisher is at the point in their journey where they feel comfortable making a repair with a new veneer. So you may want to use wood fillers or epoxy.
If you fix a piece of missing veneer with wood filler or Epoxy, you can use paint to blend the area of damage. Firstly, choose a wood filler or epoxy colour that closely matches the base colour in your veneer. This will make the process easier. Blending in a patch with a similar wood colour is easier than blending in an area with a large colour contrast.
Practice Makes Perfect
PRACTICE is my greatest advice on learning how to blend paint to mimic wood veneer.
Get small samples of different wood veneers, such as rich orange teak veneer, dark moody walnut veneer, and perhaps lighter, rustic oak veneer, and place a piece of tape on each veneer. Try blending paints together in layers until you can camouflage that piece of tape. It will be frustrating, but keep at it. This is a good skill to develop. Good Luck and enjoy the practice. Approach it as a fun challenge!
But remember, keep your touch up small, build layers, and blend edges to soften harsh lines. With the right sheen, most small colour differences will not be noticeable.


Final Thoughts

I’ve seen countless videos on social media that make blending in veneer damage look like magic, or people swear that you require specific products that might not even be available in your area. (I’m looking at you, Mohawk.)
But once you start experimenting, you will learn that it does not require skill as much as a little practice, patience, and knowledge and that your finish will mask the big problem better than your technique alone.
So roll up those sleeves, get a piece of veneer and start practising. Think of all the veneer furniture you can restore to its former glory.

This is so incredibly helpful. Especially without the use of Mohawk and paints for water based topcoats! Thank you Sarah
You’re Welcome Emma! Glad to hear that you found it useful.
Thanks Sarah. I’ve been dredging the internet for days seeking help with a bit of burnt through veneer and let me tell you, your article is the simplest and most useful of them all. All other methods involve either too expensive or unavailable products and lots of not very clearly explained steps. It’s pearls like your article that make wading through the detritus of useless online information worthwhile. Shine on!
Thank you Zaman for your kind words. It’s very much appreciated that you took the time to comment and let me know that the article helped you. It’s why I keep writing and sharing what I learn.