
Refinishing Veneer Furniture – How to for veneer Beginners
Why is everyone so fearful of refinishing veneer furniture?
When I first started refinishing, I was determined to work only with solid wood. Veneer? That felt like a cheap workaround. But after a few weeks of hunting for solid walnut mid-century dressers here in the Netherlands, I realised something important: they either don’t exist or they don’t exist in my budget. Spoiler alert — 95% of the vintage furniture I come across in Europe is veneer.
So, can you refinish wood veneer? Yes — absolutely. And it’s one of the most common questions I get as a furniture refinisher. Veneer isn’t a second-class citizen in the wood world. With the right knowledge, veneer pieces can be beautifully restored — sometimes even more easily than solid wood. You just need the right approach.
Learning to work with veneer is a crucial part of furniture refinishing. It’s unavoidable — and honestly, you’ll only hold yourself back if your only fallback for damaged veneer is Bondo (don’t even get me started) and paint. Roll up your sleeves and dive in. Veneer’s not as scary as you think — and I promise, the results are worth it.
What is Wood Veneer?
Veneer is a thin layer of wood glued onto a core material to create a piece of furniture. Veneer furniture became popular in the early 20th century as a more affordable alternative to solid wood furniture.
Key advantages of veneer furniture include a lower cost than similar solid wood, fewer raw materials used, and the ability to maximize figured wood grain patterns.
One disadvantage of wood veneer is that it’s considered less durable than solid wood. The veneer can chip, peel or crack over the years and due to its thinness, it cannot be refinished as often as solid wood.

Identifying Veneer vs Solid Wood
Wood veneer is a thin layer of decorative wood glued over another type of wood core, compared to solid wood furniture, which is made from a solid piece of wood.
Wood Veneers are often cleverly used to disguise the fact that the item is not solid wood, but there are several ways to identify solid wood from veneer. Use these five steps to determine if the piece you are viewing is veneer or solid wood.
Practice makes progress, so check out all items of furniture you come across to see if you can tell the solid from the veneer.

How Thin is Wood Veneer?
The actual thickness of the veneer varies depending on the item to which it is being applied. Since we are refinishing veneer furniture, let’s exclude panelling and musical instruments and focus only on furniture.
Since the Industrial Revolution, the typical veneer thickness for furniture has ranged around 0.6 mm to 0.8 mm. Prior to the invention of modern saws for cutting veneers, it was done by hand. So, truly antique veneer furniture is more likely 1mm to 3mm in thickness. These thicker veneers are a sign of age on your project and you will have the additional hurdle of trying to find similar veneer available today for repairs.
Check out more information on how thick wood veneer is and how to refinish it.

The different types of Wood Veneers
Not only does wood veneer come in many different species, but it is also available in different styles for applications. A veneer can be made of raw wood, paper-backed, edge banding,2 or 3-ply veneer, engineered, and more. So, what type of veneer are you looking at?
Working with veneers requires the ability to identify wood types and wood veneer types. Not being able to match the wood veneer will make repairs very difficult.

Repairing Damaged Veneer
Vintage Veneer Furniture is often in good shape when taken care of over the decades. However, veneers can become damaged over time through everyday wear and tear.
Let’s face it: Some of the veneer furniture we are refinishing is 60+ years old. So naturally, there are several common damages that can arise, along with solutions for repairing them.
Let’s Breathe new Life into our old veneer furniture. We should start by assessing the damaged area for the type of issue.
Removing Dents and Scratches
If veneer furniture has minor dents or scratches, they can often be removed by steaming the area. That’s right—steam! So don’t reach for that wood filler just yet!
The steam helps to swell the wood fibres back into shape. The simple steps to repairing dents and scratches on wood veneer furniture are straightforward.

Fixing Sanded Through Spots

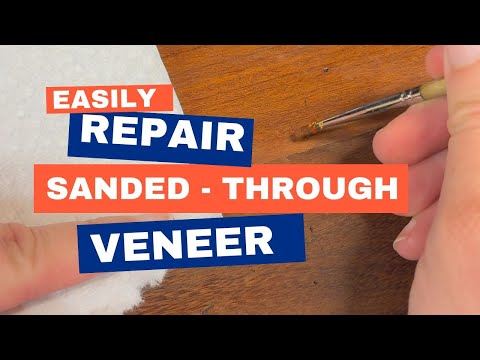
If veneer is sanded too often, aggressively, or long, it can break through the thin top layer. You can patch small sections of sanded-through patches by blending paint to mimic the missing veneer.
Sounds difficult?
Not at all. It just takes a little practice and patience to mix the right colours.
Read all the steps clearly listed for repairing sanded-through veneer, or better yet, watch the video!
Replacing Chipped Veneer
For minor chips in the veneer, you can use wood glue to reattach the pieces. But what if you no longer have the necessary pieces? How do you patch the veneer?
The process is easier than you think! Follow these easy steps to repairing chipped veneer like a pro.
Reading not your thing? This video on how to repair chipped veneer will give you a visual how to guide.

Fixing Bubbled Veneer
Over time, the veneer can lift and bubble away from the substrate beneath. This is often caused by moisture damage, which loosens the old glue. Water damage is really the enemy of wood veneer!
You can use a dry iron to reheat the old glue and weights to help it to adhere again. However, if this doesn’t work, the next step is a relatively simple procedure.
Get yourself a hobby needle and follow the steps to repairing bubbled veneer.

Lifting Veneer
Lifting or loose veneer differs from bubbled veneer as it starts on the edges. As the veneer glue fails, the veneer lifts and lifting veneer on the edge is damaged and must be handled immediately. If not repaired, it will begin to chip away.
The repairs are simple, requiring glue and clamps or weights.
Removing the Old Finish from Veneer
When refinishing wood veneer, you usually need to remove the existing finish first. I personally prefer to use a chemical stripper rather than a carbid scrapper, which could scratch the thin veneer. A stripper lets you remove the original finish without damaging the thin wood veneer surfaces.
Refinishing bare wood is always recommended. Once you have made the necessary repairs or replacement of veneer, you can add your new finish for a sleak new look.
How to Paint Wood Veneer Furniture
Painting veneer furniture is a great way to breathe new life into a piece — especially if it’s been heavily damaged or you’re after a bold, modern look.
But before you prime that brush, keep this in mind: painting veneer often requires a bit of prep work first. You’ll want to fill missing veneer spots and address any bubbling or chips so your paint lays smooth and professional.
Right now, most of my repair tutorials focus on restoring veneer to keep the natural wood finish — not necessarily prepping it for paint.

Once your surface is smooth and stable, here’s the painting process I follow:
Clean thoroughly to remove dust, oil, or residue.
Scuff sand lightly with 180–240 grit to give your primer something to grip.
Prime smartly. Dewaxed Shellac work best on slick surfaces like veneer.
Paint in thin coats. I personally love water-based mineral paint, but choose whatever gives you the finish and durability you’re after.
Painting veneer isn’t cheating — it’s a creative solution that saves tired old pieces and turns them into showstoppers.
Removing Veneer

Now, there may be times when you are refinishing veneer furniture and find yourself needing to remove the veneer—that’s right, the whole thing from the entire surface!
It may be beyond repair, or you may want to go with a different wood species.
Removing veneer is easy; it’s simply time-consuming. When you first start you will consider it a good idea, but be prepared for fustration to hit. Just keep at it, I promise it will be worth the effort!
You can remove veneer using two different methods: the heat method, using a heat gun to loosen the glue, or the wet method, using a wet towel and a dry iron.
I personally find the easiest way to do this for large sections of veneer is the wet method.
You will need to take a few extra precautions when removing veneer from particle board. You can also simply sand the veneer away!

Applying New Veneer

Applying a new veneer can seem daunting. How do you afford enough clamps? What about a veneer press?
Thankfully, there are ways to work around these requirements. Modern wood glue can be heated with an iron. I have had good success ironing on veneer with standard wood glue.
That’s right! Imagine the refinishing possibilities when you simply apply new veneer with glue and iron.
But what about applying veneer to a curve? Well I have got you covered there as well.

Veneer Tools
Now, each repair will require a different set of tools, and most of them, such as tack cloth, will already be in your arsenal. But do you need any tools for working with veneer?
I personally recommend a Glue Roller as a must-have tool for working with veneer, especially if you are applying new sheets of veneer. You should also have A Dry Iron and A Heat Gun. Most applications or veneer removals involve medium to high heat.
I would avoid bothering with a veneer saw. I have one and prefer using my utility knife over the veneer saw.
Nearly all the other tools you will require are the standard Professional Furniture Refinishing Tools. I assume if you are already refinishing furniture, you will have most of the items on this list, like a sanding block, chemical stripper, putty knife, and so on.

Gluing Veneer
There are various glues on the market for veneer use, so I do not blame you for being confused as to which is best for you or your project. I’m currently busy testing out various types of glue and hope to come back with a concrete list soon.
Sanding Veneer

The most frequent question about veneer is how to safely sand it. Well, I have some good news and some bad news. Which would you prefer first?
The good news is that I share my techniques for avoiding sanding through the thin veneer layer. These sanding veneer tips are handy to put into practice and will help you minimize the dreaded burn-through.
The bad news is that you never fully realize how thick the veneer you are working on is. Perhaps the veneer has been refinished before, in which case it would be ultra-thin. Even the best refinishers will occasionally burn through the veneer.
Veneer Edge Banding
I’ve included a separate section for veneer Edge banding. These edges are an easy and effective way to finish the exposed edges of veneer furniture and surfaces.
However, it is also the first area of veneer that tends to experience damage. Veneer Edge Banding’s removal and application are slightly different from those of sheets of veneer.

Removing Edge Banding
The process is even easier than that of veneer sheets. The best way to remove veneer edge banding is to use the heat method. The edge banding usually comes off in long ribbons this way.
Applying Edge Banding
Veneer Edge Banding is often pre-glued. This is the simplest way to apply it, and I do not recommend any other way. It’s as simple as pressing the edge banding to the area you want to apply it, applying heat, allowing it to cool, and cutting off the overhang. Easy Peasy!
Final Thoughts
Refinishing veneer furniture is nothing to be feared when you break it down. It is a process of understanding the nature of the veneer, the potential damage you may face, and the methods of repair.
Conquering skills around veneer opens up the limitless potential for refinishing old furniture, which was closed off or could only be solved by painting.
So roll up those sleeves, drag out that dresser you have been avoiding and start working on that veneer refinishing project.

Just having some untreated Elm Cluster veneer added to my media wall. Should it be lawyered or treated in som way to stop it drying out and cracking
Hi David,
I would consider treating the veneer somehow. Wood dries out over time, and thinner woods like veneer will dry faster. Which can lead to cracking. There are many ways that you can choose to protect the veneer. Oils, oil based top coats, water based top-coats etc. There are pros and cons for each type of finish and your personal preference for the look matters as well.
If you have any left over pieces of the veneer, I would test out a number of products to see what works the best for the look you wish to achieve.
All the best,
Sarah