
How to Make Shellac Yourself
Shellac is one of the most versatile finishes in furniture refinishing. Whether restoring an antique, making wood grain pop or sealing a project for durability, making your own shellac is a skill worth learning. It’s easy, economical, and gives you control over the final finish.
Ready to roll up your sleeves? Let’s dive into how to make shellac from scratch!

Why Make Your Own Shellac?
Shellac has been a go-to wood finish for centuries. It’s versatile, beautiful, and easy to use. Learn more about its rich history and applications here.
Making shellac yourself:
Cost Savings: Pre-mixed shellac can be quite expensive. Mixing your own saves money and allows you to create a custom finish that perfectly suits your project.
Custom Thickness: Control the ratio of flakes to alcohol for the perfect consistency.
Fresher Product: Homemade shellac lasts longer and performs better than store-bought versions that may have sat on shelves for months.

Want to know the best part? It takes just minutes to prepare!
For more on the benefits of shellac, check out Shellac Pros and Cons.
Tools and Materials You Need
Shellac Flakes (Waxed or Dewaxed)
Denatured alcohol (99% preferred)
Glass Jar with Lid
(Reuse an old jam jar!)
Kitchen Scale
Stirring Stick or Spoon
Optional: Coffee Filter or Paint Strainer

Handpicked Supplies for Shellac Success
Shellac Flakes
Why you need it: Choose dewaxed flakes for a smoother finish.

Buy on Amazon
My Local Favourite (ships to most EU Countries)
Denatured Alcohol
Why you need it: This dissolves the flakes for perfect shellac.

Buy on Amazon USA
Shop in the EU
*Availability may vary by region. If a product is unavailable in your country, let me know, and I’ll suggest alternatives!
Step-by-Step Guide: How to Make Shellac
Making shellac is incredibly easy. The recipe only requires two ingredients. Once you make your own, you will not go back to premixed shellac.

Step 1: Measure the Ingredients
Start by measuring your shellac flakes and alcohol.
For a standard 2-pound cut, use 25 grams of flakes for every 100 grams of alcohol.
Need a lighter mix? Use 12.5 grams of flakes for a 1-pound cut.
Mix 37.5 grams of flakes for a 3-pound cut for a heavier finish.
Imperial Conversion:
For a 2-pound cut, use 1 ounce of flakes for every 4 ounces of alcohol.
Adjust proportionally for lighter or heavier cuts.
Weigh the flakes and alcohol using a kitchen scale to ensure accuracy

Step 2: Mix the Flakes and Alcohol
Add the flakes to your glass jar, then pour in the alcohol. Close the lid tightly and shake the jar to start the dissolving process.
Tip: Dissolving can take 24 hours. Shake the jar periodically to speed it up!

Step 3: Let It Dissolve
Place the jar in a cool, dark place. Allow the mixture to sit for 12–24 hours until the flakes dissolve fully.
If some flakes remain, strain the mixture through a coffee filter or paint strainer to remove residue.

Step 4: Test and Adjust
Before you start using your shellac, test it on scrap wood.
If it’s too thick, add a small amount of alcohol and mix again.
For troubleshooting tips, see How to Thin Shellac.
How to make shellac is really that simple! Two ingredients combined and allowed to dissolve into a wonder wood finish.
Now let’s look into customizing your mix and storing it for best results.
Customizing Your Shellac Mix
The best part of making your own shellac is that it allows you to customize your mix to your liking.
1-Pound Cut:
A lighter mix ideal for sealing wood or priming before painting.
Use 12.5 grams (or 0.5 ounces) of flakes to 100 grams (or 4 ounces) of alcohol.
2-Pound Cut:
The standard mix for most woodworking projects.
Use 25 grams (or 1 ounce) of flakes to 100 grams (or 4 ounces) of alcohol.
3-Pound Cut:
A thicker, more durable mix for high-wear surfaces.
Use 37.5 grams (or 1.5 ounces) of flakes to 100 grams (or 4 ounces) of alcohol.

Storage Tips
Using denatured alcohol is a key step in making shellac, but it’s essential to handle it safely. Here’s a guide to ensure you’re taking proper precautions.
Homemade shellac doesn’t last forever, but proper storage can extend its usability:
Airtight Containers: Store in a tightly sealed jar to prevent evaporation.
Cool, Dark Place: Avoid direct sunlight or heat to slow down thickening.
Label the Jar: Note the date of mixing. Shellac lasts about 6 months before it begins to degrade.
For more detailed tips, visit How to Store Shellac.

Common Mistakes to Avoid
While Shellac is a rather easy product to make, there are a few mistakes which could cause you issues.
Using Expired Flakes
Shellac flakes can lose their potency over time. Always check the date and store flakes in a cool, dry place. Learn more in How to Store Shellac.
Incorrect Ratios
Precise measurements are key to a flawless finish. Stick to the 1-pound, 2-pound, or 3-pound cuts as your baseline.
Impurities in the Mix
Use high-quality alcohol and strain your mixture to avoid contaminants in your finish.
Video Make your own Shellac
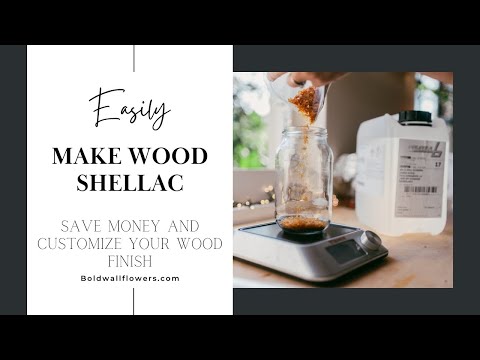
Are you a visual learner? I’ve got you covered! Watch as I mix up a batch of shellac, step by step.
FAQ About Making Shellac
Want to perfect your application technique? Here’s a detailed guide on applying a flawless shellac finish.
Homemade shellac typically lasts 6 months if stored in an airtight container. For storage tips, visit How to Store Shellac.
Denatured alcohol is recommended for dissolving flakes. Pure alcohol works as well but it may be harder to source.
Waxed shellac has a natural sheen, while dewaxed shellac works better under topcoats. Learn more in Waxed vs. Dewaxed Shellac.
I made a cost breakdown in 2023; which included any additional shipping costs.
Dry Flakes – The cheapest I could find was 500 grams for 49.05 Euros / 2.45 euro per 25 grams.
Ethanol Alcohol – 49.92 Euros / 100 ml is approximately 1 euro
Therefore, I can make a small batch of approximately 100 ml for 3.45 or 34.50 per litre. Compare this to the options I have available locally of Pre-mixed from Labshop, which was 53.14 euro (including shipping).
34.50 vs 53.14 euros; It’s a no brainer for me! Check out your own local prices and compare for yourself.
You can very easily adjust the thickness of your own homemade shellac by adding additional denatured alcohol or shellac flakes. Read all the details on Thinning Shellac.

Next Steps
Now that you’ve mastered making shellac, it’s time to put it to use!
Check out these related guides:
Using Shellac as a Toner
The Colors of Shellac: Choosing the Right Tone
Don’t forget to share your results!
Comment below or tag us on social media with your finished projects.

Thank you for this I am keen to try but am totally put off using methylated spirits due to the toxicity. Of course I have ppe so can use that, but this is maybe the only downside?
How do you make it semi matte or satin? Less sheen than a gloss really. Thanks again!
Hi Emma! Very good questions.
I’ve unfortunately not found a way around using denatured alcohol in wood working. I use it specifically with shellac and for cleaning the wood rather than water. I use denatured ethanol for making the shellac and wear gloves and ppe when applying it. It dries incredibly quickly and I find it doesn’t linger long in my workspace.
Now Shellac is incredibly glossy. I have read that you can find matte versions but I never actually have. When I want a less shiny surface, I simply top coat with a matte, waterbased top coat and it will knock back the sheen.